


In the digital age, where academic and professional documents are often created using tools like Google Docs, formatting plays a crucial role in ensuring clarity and professionalism. One such formatting technique that is particularly useful for bibliographies, reference lists, and citations is the hanging indent. This article will guide you through the process of inserting a hanging indent in Google Docs, whether you’re working on a PC or mobile device.
What is a Hanging Indent?
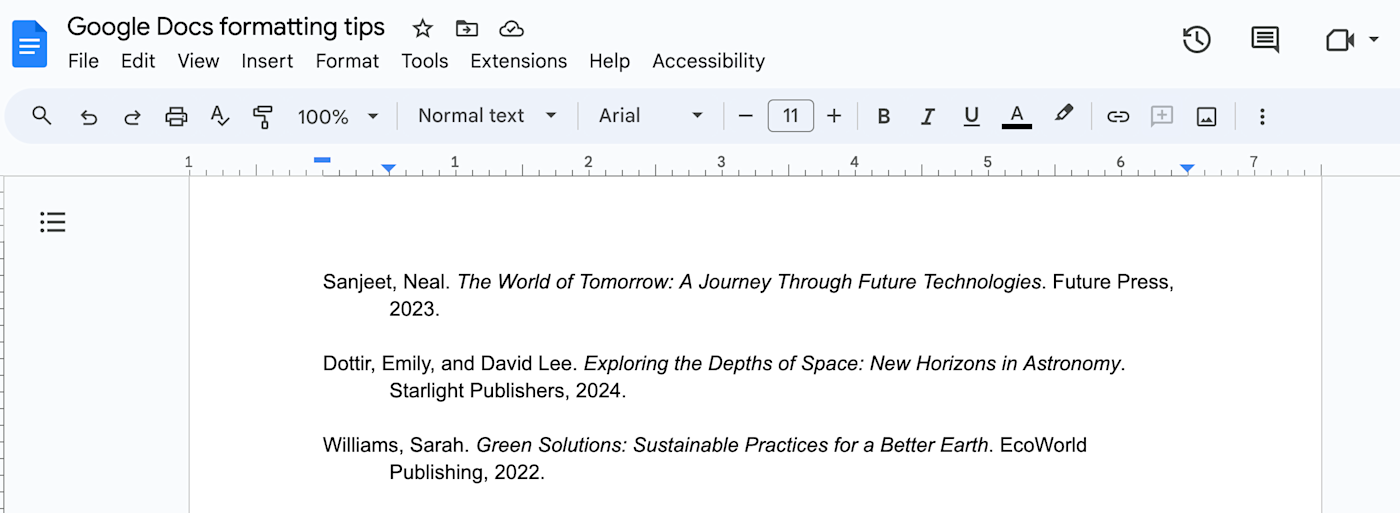
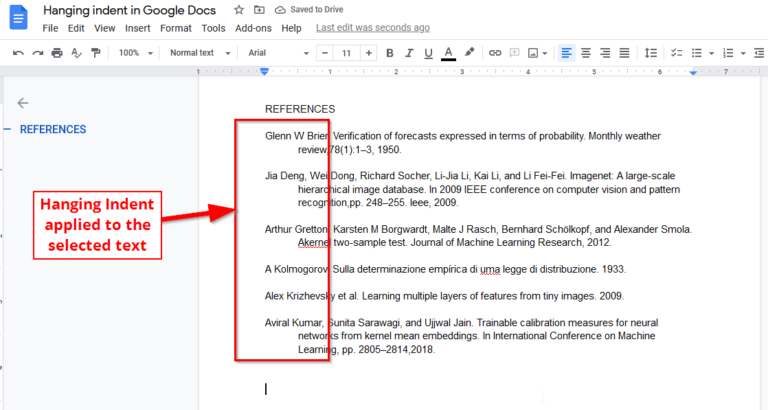
A hanging indent is a type of paragraph formatting where the first line of the paragraph aligns with the left margin, while all subsequent lines are indented. This formatting is commonly used in citation styles like APA, MLA, and Chicago, as it helps readers easily distinguish between different entries in a list.
Why Use a Hanging Indent?
Hanging indents are particularly useful in the following scenarios:
- Bibliographies and Reference Lists: They help make each entry stand out.
- Legal Documents: They enhance readability by separating sections clearly.
- Academic Papers: They follow specific style guides, making your work appear more polished.
Now that we understand the purpose of a hanging indent, let’s move on to how to create one in Google Docs.
How to Insert a Hanging Indent in Google Docs (PC)
There are two primary methods to insert a hanging indent in Google Docs: using the Ruler and using the Format menu. Let’s explore both.
Method 1: Using the Ruler
- Open Your Document: Launch Google Docs and open the document where you want to apply the hanging indent.
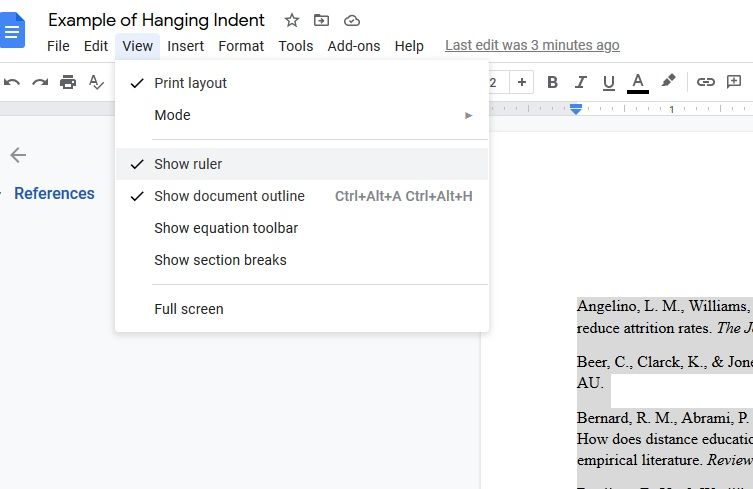
- Show the Ruler: If the ruler isn’t visible, go to View > Show Ruler.
- Select the Paragraph: Highlight the paragraph you wish to format.
- Adjust the Indents:
- The Left Indent marker (an upside-down triangle) controls the indentation of the entire paragraph.
- The First Line Indent marker (a horizontal bar) controls the indentation of just the first line.
- Drag the First Line Indent Marker Left: To create a hanging indent, drag the First Line Indent marker to the left until it’s aligned with the left margin.
- Drag the Left Indent Marker Right: Drag the Left Indent marker to the right to indent the rest of the paragraph.
Method 2: Using the Format Menu
- Select the Text: Highlight the paragraph you want to format.
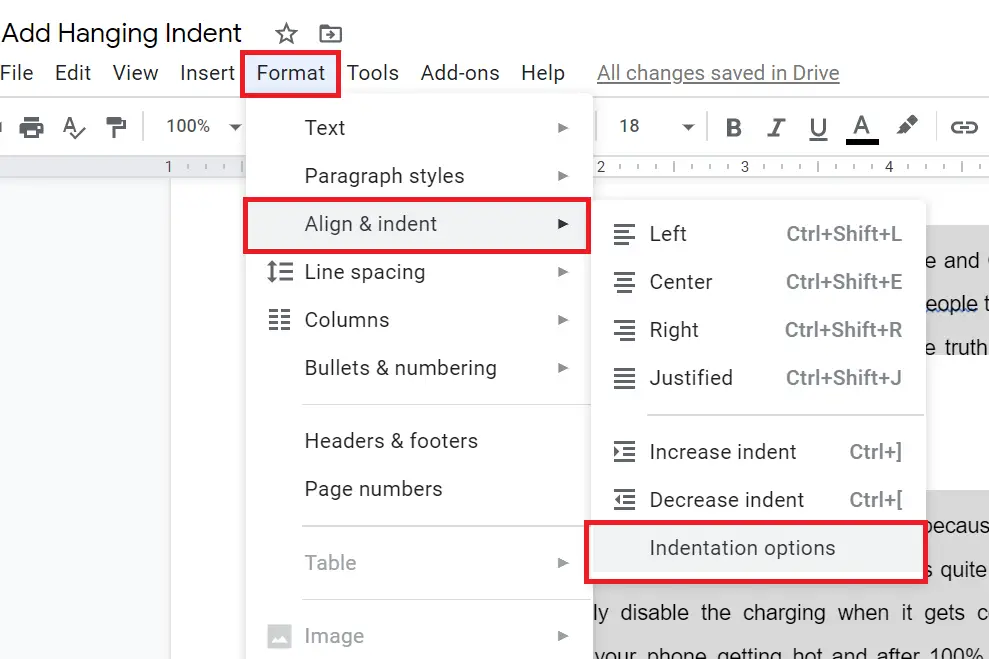
- Go to Format: Click on Format > Align & Indent > Indentation Options.
- Set the Special Indent:
- Under the Special section, select Hanging from the dropdown menu.
- Adjust the indentation size if needed (usually 0.5 inches or 1.27 cm).
- Apply the Changes: Click Apply to save your settings.
How to Insert a Hanging Indent in Google Docs (Mobile)
While the mobile version of Google Docs doesn’t support direct hanging indents, you can still achieve a similar effect by adjusting the left indent manually.
- Open the Document: Launch the Google Docs app on your Android or iPhone.
- Enter Edit Mode: Tap the Pencil icon at the bottom right to switch to edit mode.
- Select the Text: Tap and hold to highlight the paragraph you want to format.
- Access Formatting Options: Tap the Format icon (three dots) at the top.
- Adjust the Left Indent:
- Go to the Paragraph tab.
- Tap the Right Indent option to increase the indentation of the entire paragraph.
Tips for Using Hanging Indents
- Consistency is Key: Ensure that all entries in your bibliography or reference list use the same indentation.
- Check Style Guides: Different citation styles may require specific indentation sizes. For example, APA typically uses 0.5 inches, while MLA uses 1.27 cm.
- Use Keyboard Shortcuts: On a PC, you can use Ctrl + ] to increase the indent and Ctrl + [ to decrease it.
Common Mistakes to Avoid
- Forgetting to Select the Entire Paragraph: Make sure you highlight the entire paragraph before applying the indent.
- Confusing First Line Indent with Left Indent: A hanging indent requires the first line to be unindented while the rest are indented.
- Not Checking the Preview: Always review your document to ensure the hanging indent looks correct.
Conclusion
Inserting a hanging indent in Google Docs is a simple yet powerful way to enhance the readability and professionalism of your documents. Whether you’re working on a bibliography, legal document, or academic paper, mastering this formatting technique will help you meet the standards of various style guides and improve the overall appearance of your work.
By following the steps outlined in this guide, you’ll be able to create hanging indents with ease, whether you’re using a PC or a mobile device. Remember to always double-check your formatting to ensure consistency and accuracy.
If you found this guide helpful, feel free to share it with others who might benefit from learning how to insert a hanging indent in Google Docs.
Author: Jane Doe
Title/Role: Digital Content Specialist
Credentials: With over 10 years of experience in content creation and digital marketing, Jane has helped numerous professionals master the art of document formatting and productivity.
Profile Link: Jane Doe Profile
Sources:
– Google Docs Help Center
– APA Style Guide
– MLA Handbook
Internal Links:
– How to Create a Bibliography in Google Docs
– Formatting Tips for Academic Papers
– Using Keyboard Shortcuts in Google Docs
Schema Markup:
<script type="application/ld+json">
{
  "@context": "https://schema.org",
  "@type": "Article",
  "headline": "How to Insert a Hanging Indent in Google Docs: A Step-by-Step Guide",
  "description": "Learn how to insert a hanging indent in Google Docs with our easy-to-follow guide.",
  "author": {
    "@type": "Person",
    "name": "Jane Doe"
  },
  "datePublished": "2025-04-05",
  "publisher": {
    "@type": "Organization",
    "name": "Your Website Name",
    "logo": {
      "@type": "ImageObject",
      "url": "https://www.yourwebsite.com/logo.png"
    }
  }
}
</script>
Featured Snippet:
To insert a hanging indent in Google Docs, select the paragraph, go to Format > Align & Indent > Indentation Options, choose ‘Hanging’ under Special, adjust the size, and click Apply.


More Stories
How to Claim Your Joy in League of Legends: A Step-by-Step Guide
What is WSET? A Comprehensive Guide to Wine Education
Why Are People Cancelling Spotify? Key Reasons Behind the Trend