


Growing your own sprouts at home is an easy and rewarding way to enjoy fresh, nutritious food all year round. Whether you’re a busy parent, a health-conscious individual, or simply someone who loves to cook, sprouts are the perfect addition to your kitchen. In this guide, we’ll walk you through the entire process of growing sprouts at home, from selecting the right seeds to harvesting and enjoying your first batch.

Why Grow Sprouts at Home?
Sprouts are packed with nutrients and can be grown in just a few days. They’re a great source of vitamins, minerals, and antioxidants, making them a healthy addition to any diet. Growing your own sprouts also means you can enjoy them at their freshest, without the need for preservatives or long-distance transportation.
In addition to being nutritious, sprouts are incredibly versatile. They can be added to salads, stir-fries, sandwiches, and even smoothies. Their crisp texture and mild flavor make them a great base for a variety of dishes.
What You’ll Need to Start Growing Sprouts
To begin growing sprouts at home, you’ll need the following:
-
Sprouting Seeds: Choose seeds that are specifically labeled for sprouting. These seeds have been tested for high germination rates and safety standards. Popular options include mung beans, alfalfa, broccoli, radish, and lentils.
-
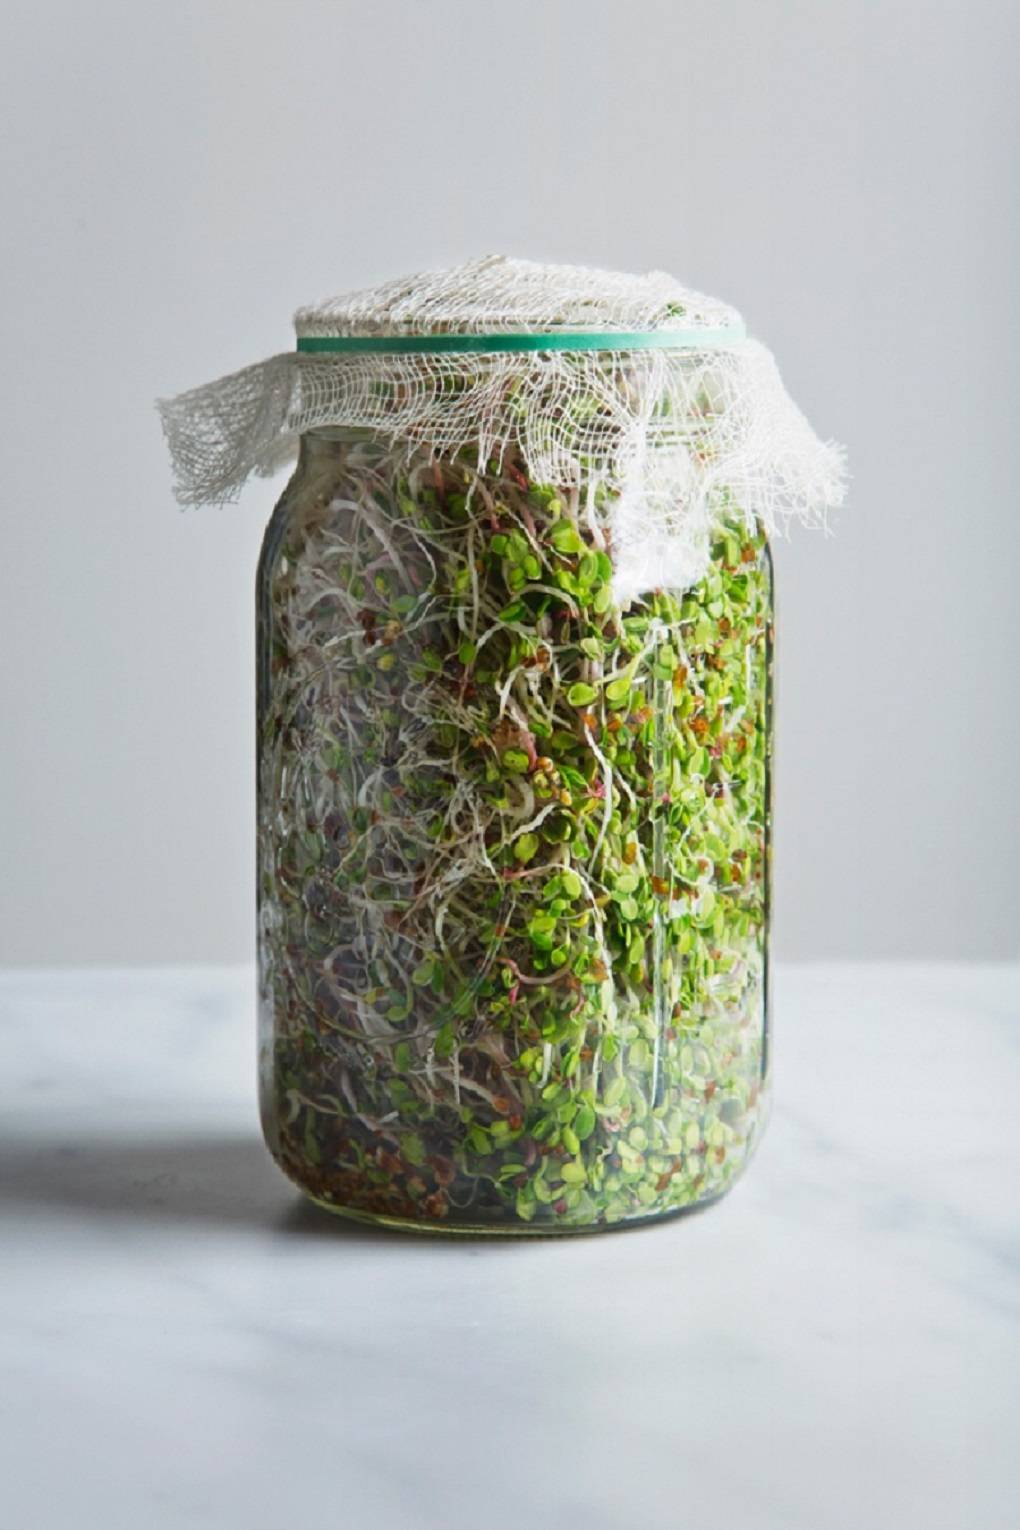
A Jar or Container: A 1-liter (64 oz) mason jar or a similar container works well for sprouting. Make sure it has a mesh lid or a piece of cheesecloth that can be secured with a rubber band.
-
Water: Use clean, filtered water for rinsing and soaking the seeds.
-
A Drainage Area: A dish rack or a sunny windowsill where you can place the jar upside down to drain excess water.
Step-by-Step Guide to Growing Sprouts
Day 1: Soaking the Seeds
Start by thoroughly rinsing half a cup (80g) of sprouting seeds under running water. Place the seeds in a jar and cover them with water. Let them soak for at least 12 hours, or overnight. This step helps to soften the seed coat and initiate the germination process.
Day 2: Rinsing and Draining
The next day, rinse the soaked seeds under running water. Drain the water completely, then place the jar upside down in a dish rack or on a windowsill. The jar should be positioned so that the seeds are not sitting in water but are still moist.
Day 3: Continued Rinsing and Draining
Repeat the rinsing and draining process once in the morning and once in the evening. This helps to keep the seeds moist and prevents the growth of harmful bacteria.
Day 4: Monitoring Growth
By the fourth day, you should start to see small sprouts emerging from the seeds. Continue rinsing and draining as before. At this stage, the sprouts are still very young and will continue to grow over the next couple of days.
Day 5: Harvesting Your Sprouts
On the fifth day, your sprouts should be ready to harvest. Simply cut open the jar and remove the sprouts. Rinse them one final time and pat them dry. They can now be enjoyed in your favorite recipes.
Tips for Success
- Use Clean Equipment: Always use clean jars and tools to prevent contamination.
- Keep It Dark: Sprouts grow best in the dark, so avoid placing them in direct sunlight.
- Check Regularly: Monitor your sprouts daily to ensure they are growing properly and not becoming too wet or dry.
- Store Properly: Once harvested, store your sprouts in an airtight container in the refrigerator. They should last for up to three days.
Safety Tips for Eating Sprouts
While sprouts are nutritious, they can also carry a risk of foodborne illness if not handled properly. To minimize this risk:
- Cook Thoroughly: If you’re concerned about safety, especially for children, pregnant women, or individuals with weakened immune systems, cook your sprouts until they are steaming hot.
- Wash Thoroughly: Even though washing doesn’t eliminate all bacteria, it can help reduce the risk.
- Avoid Cross-Contamination: Keep your sprouts separate from raw meats and other potentially contaminated foods.
Conclusion
Growing sprouts at home is a simple and rewarding process that can provide you with a steady supply of fresh, nutritious food. With just a few basic supplies and a little bit of care, you can enjoy the benefits of sprouts all year round. Whether you’re a seasoned gardener or a complete beginner, there’s no better time to start than now.
Author Section
Author: Sarah Thompson
Title/Role: Food and Nutrition Expert
Credentials: Sarah is a certified nutritionist with over a decade of experience in promoting healthy eating habits. She specializes in plant-based diets and sustainable food practices.
Profile Link: www.sarahthompsonnutrition.com
Sources
- Centers for Disease Control and Prevention – Sprout Safety
- USDA – Nutritional Value of Sprouts
- Johnny’s Selected Seeds – Sprouting Guide
Call to Action
Ready to start growing your own sprouts? Gather your supplies and give it a try today! With just a few days of effort, you’ll have a fresh, healthy addition to your meals. Don’t forget to share your sprouting journey with others and inspire them to grow their own food too.
URL Slug
how-to-grow-sprouts-at-home
Schema Markup
{
  "@context": "https://schema.org",
  "@type": "Article",
  "headline": "How to Grow Sprouts at Home: A Simple Guide for Fresh, Nutritious Sprouts All Year Round",
  "datePublished": "2023-10-05",
  "author": {
    "@type": "Person",
    "name": "Sarah Thompson"
  },
  "publisher": {
    "@type": "Organization",
    "name": "Healthy Living Today",
    "logo": {
      "@type": "ImageObject",
      "url": "https://www.healthylivingtoday.com/logo.png"
    }
  },
  "description": "Learn how to grow sprouts at home with this easy guide. Get fresh, nutritious sprouts all year round with just a few simple steps."
}
Featured Snippet Optimization
Grow sprouts at home by soaking seeds in a jar, rinsing them twice daily, and harvesting after 3-5 days. Ensure you use sprouting seeds, keep them in the dark, and rinse thoroughly to maintain freshness and safety.


More Stories
US Trending News: The History and Legacy of Zoo York in Streetwear Culture
What Is Yodo Para Tiroides and How Does It Affect Thyroid Health?
Understanding ‘You Got That Right’ in The New York Times: Context and Implications