


As the holiday season approaches, many are turning to creative ways to express their love for winter. One of the most enchanting trends this season is snowflake nail art, a delicate and elegant design that captures the magic of the season. Whether you’re a seasoned nail artist or just starting out, mastering snowflake nail art can be an enjoyable and rewarding experience. In this guide, we’ll walk you through the process of creating stunning snowflake designs, from choosing the right tools to applying the final touches.
Understanding Snowflake Nail Art
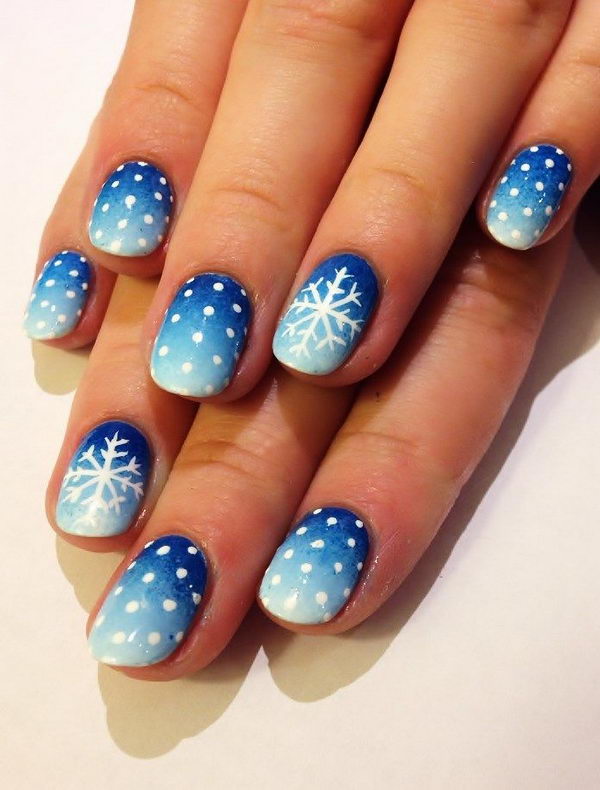
Snowflake nail art is a popular trend that mimics the intricate patterns found in real snowflakes. This design can range from simple dots and lines to more complex, multi-layered creations. The key to achieving a beautiful snowflake design lies in using clean lines, precise application, and a strategic use of colors. Whether you’re going for a minimalist look or something more elaborate, there’s a snowflake design that suits every style.
Tools and Materials Needed
Before diving into the design process, it’s essential to gather the necessary tools and materials. Here’s a list of what you’ll need:
- Base Coat: Protects your nails and provides a smooth canvas.
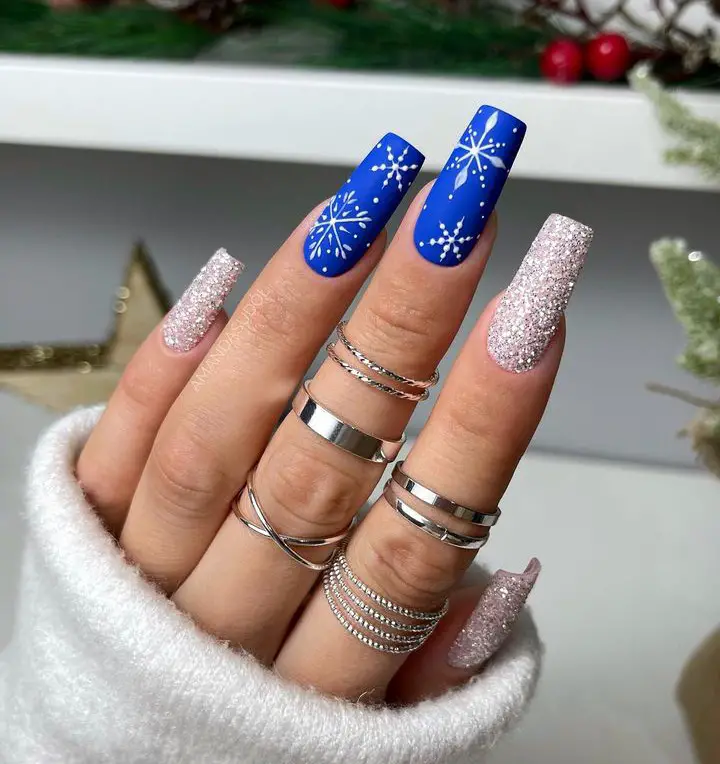
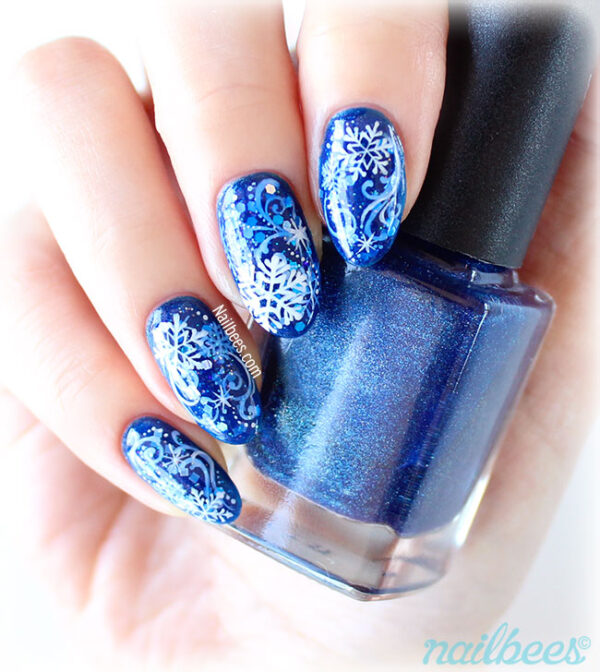
- Nail Polish (Background Color): Choose a color that complements the snowflakes. Popular choices include dark blues, reds, greens, and purples.
- Nail Polish (Snowflake Color): White is the classic choice, but silver, glitter, or even pastel shades can add a unique touch.
- Thin Nail Art Brush: Crucial for creating delicate lines and details. A very fine detail brush is ideal.
- Dotting Tool: Helps create even dots for the snowflakes’ central point and ends of branches. Varying sizes are useful.
- Toothpick or Nail Art Dotter: An alternative for creating dots if you don’t have a dotting tool.
- Top Coat: Seals in your design, protects it from chipping, and adds shine.
- Nail Polish Remover: For cleaning up mistakes and excess polish.
- Cotton Swabs: Dip in nail polish remover to correct errors.
Step-by-Step Guide to Creating Snowflake Nail Art
Creating snowflake nail art is a fun and creative process that requires patience and precision. Follow these steps to achieve a beautiful and elegant design.
Step 1: Prepare Your Nails
Start with clean, dry nails. Remove any existing polish and shape your nails to your desired length and style. Gently push back your cuticles to create a clean canvas.
Step 2: Apply Base Coat
Apply a thin, even layer of base coat to each nail. Allow it to dry completely. This is a crucial step for nail health and longevity of your design.
Step 3: Apply Your Base Color
Apply one or two coats of your chosen base color polish, allowing each coat to dry completely before applying the next. Ensure the color is opaque and even. This sets the stage for your snowflake design.
Step 4: Creating Your Snowflake Design
This is where the fun begins! There are several methods to create snowflake designs. Here are two popular options:
Dotting Tool Method
Dip your dotting tool into the white polish. Create a central dot on your nail. Then, use the dotting tool to create six symmetrical dots radiating outwards from the center. These dots will form the main points of your snowflake. Add smaller dots branching out from these main points to create a more intricate snowflake.
Thin Brush Method
Using your thin nail art brush, dip it into the white polish. Starting from the center of your nail, draw six thin lines radiating outwards, forming the basic snowflake shape. Then, add smaller lines branching out from these main lines, creating a more detailed and complex design. Remember to use a light touch and work slowly for best results.
Step 5: Adding Details (Optional)
Enhance your snowflakes with additional details. You can add tiny dots of glitter to the center of each snowflake or use a thin brush to add subtle shading. Consider adding a few scattered dots around the snowflakes to simulate falling snow.
Step 6: Apply Top Coat
Once your snowflake design is completely dry, apply a generous layer of top coat to seal in your design and add a glossy finish. This will protect your artwork and ensure it lasts longer.
Step 7: Clean Up
Use a cotton swab dipped in nail polish remover to clean up any mistakes or excess polish around your cuticles. If you used liquid latex or petroleum jelly, simply peel it away.
Tips and Best Practices
Whether you’re creating your own snowflake nail art or using pre-made designs, here are some tips and best practices to ensure your nails look flawless:
- Start with a clean and well-prepared nail surface to ensure the best adhesion and longevity.
- Use a dotting tool or a fine-tipped nail art brush to create the snowflake patterns with precision.
- Experiment with different color combinations, such as white and silver or blue and holographic glitter, to create unique and eye-catching designs.
- Seal your nail art with a high-quality top coat to protect the design and add a glossy finish.
- If using press-on nails, follow the instructions closely for a seamless application and long-lasting wear.
Frequently Asked Questions
Here are some commonly asked questions about creating snowflake nail art:
1. What type of white polish is best for snowflake nail art?
A highly pigmented white polish is ideal. Consider a specialized nail art polish with a fine brush for intricate details. Gel polish, cured with a UV/LED lamp, offers excellent staying power and is great for intricate designs.
2. What if I don’t have dotting tools?
You can use toothpicks, bobby pins, or even the rounded end of a paintbrush. Experiment with different items to see what works best for you. The key is to find something with a rounded tip that you can control easily.
3. How do I make my snowflakes symmetrical?
Practice is key! Start with a central dot or line and work outwards, focusing on creating evenly spaced and sized branches. Using a grid of dots as a guide before applying the polish can help.
4. My snowflakes are smudging. What am I doing wrong?
Ensure your base color is completely dry before applying your snowflake design. Also, avoid applying too much pressure with your dotting tool or brush. Work in thin, light layers. Patience is crucial!
5. Can I use nail stickers or stencils for snowflake nail art?
Absolutely! Nail stickers and stencils are great options for beginners. They provide pre-made designs that are easy to apply and create a professional-looking finish.
6. How do I make my snowflake nail art last longer?
Apply a high-quality base coat and top coat. Reapply top coat every other day. Avoid activities that can damage your nails, such as washing dishes without gloves. Consider using gel polish for extra durability.
7. What are some alternative color combinations for snowflake nail art?
While white on blue is classic, try silver on black, gold on deep red, or even pastel shades like lavender and mint green. Don’t be afraid to experiment and create your own unique winter wonderland.
8. How do I remove glitter polish used for accents?
Soaking cotton pads in nail polish remover, placing them on your nails, and wrapping them in foil for a few minutes is an effective method. This allows the remover to penetrate the glitter polish and makes it easier to wipe away.
9. What if I mess up my snowflake design?
Don’t panic! Use a cotton swab dipped in nail polish remover to carefully erase the mistake. Allow the area to dry completely before attempting to reapply the design.
10. Where can I find inspiration for different snowflake designs?
Pinterest, Instagram, and nail art blogs are excellent resources for finding inspiration. Search for “snowflake nail art” or “winter nail designs” to discover a wealth of ideas. Experiment and adapt designs to fit your personal style.
Conclusion: Embrace the Winter Spirit
Creating snowflake nail art is a fun and rewarding way to express your creativity and celebrate the winter season. By following these steps and practicing regularly, you can easily transform your nails into miniature works of art. Don’t be afraid to experiment with different colors, techniques, and embellishments to create your own unique and dazzling snowflake designs. Embrace the spirit of winter and let your nails shine!
Author: [Nama Lengkap]
Title/Role: Beauty and Fashion Writer
Credentials: With over a decade of experience in the beauty industry, [Nama Lengkap] has been featured in numerous fashion and lifestyle publications. A certified nail technician and makeup artist, [Nama Lengkap] specializes in creating unique and elegant looks that reflect the latest trends.
Profile Link: [Link profil, opsional]
Sources:
– Daring Lily Official Website
– Nail Art Tutorials on YouTube
– Pinterest – Snowflake Nail Art
Internal Links:
– How to Do Simple Snowflake Nail Art? A Winter Wonderland at Your Fingertips
– Creating Stunning Snowflake Nail Art with Ease
– How to Make Snowflake Nail Art? A Comprehensive Guide to Winter Wonderland Fingertips
Call to Action:
Stay updated with the latest trends in beauty and fashion. Explore our articles to discover new styles and techniques that will elevate your look this winter.
URL Slug: master-snowflake-nail-art-guide
Image Optimization:
Schema Markup:
{
  "@context": "https://schema.org",
  "@type": "Article",
  "headline": "Mastering Snowflake Nail Art: Step-by-Step Guide for Winter Elegance",
  "description": "Learn how to create stunning snowflake nail art with this comprehensive guide. Perfect for winter elegance.",
  "author": {
    "@type": "Person",
    "name": "[Nama Lengkap]"
  },
  "publisher": {
    "@type": "Organization",
    "name": "Your Publication Name",
    "logo": {
      "@type": "ImageObject",
      "url": "https://yourwebsite.com/logo.png"
    }
  },
  "datePublished": "2023-12-01",
  "dateModified": "2023-12-01"
}
Featured Snippet Optimization:
“Mastering snowflake nail art involves using clean lines, precise application, and strategic color choices. Start with a base coat, choose a complementary color, and use a dotting tool or thin brush to create symmetrical snowflake patterns. Seal with a top coat for a glossy finish.”
CTR Optimization:
“Transform Your Nails into Winter Wonders: Master Snowflake Nail Art Today!”
Dwell Time:
Discover the secrets to creating beautiful snowflake nail art that will impress everyone this winter. Learn the techniques and tools needed to achieve this elegant look.
Bounce Rate Reduction:
Follow our step-by-step guide to create stunning snowflake nail art. From preparing your nails to applying the final touches, this article covers everything you need to know.
Reader Engagement:
What’s your favorite snowflake nail art design? Share your thoughts and experiences in the comments below. Let’s celebrate the magic of winter together!


More Stories
US Trending News: The History and Legacy of Zoo York in Streetwear Culture
US Trending News: Exploring Zach Top Greensboro
US Trending News: Youngboy Concert in Birmingham: What to Know Before You Go